Fix loose door trim
Loose door trim (the casing around the door) has usually lost its grip because its nails were too short, missed the framing or worked loose from years of the door slamming. Pressing it back and driving longer finish nails into the jamb and the framing behind the wall fixes it in about half an hour. A little glue at the corner keeps the miter from opening again. Long nails into the framing are what keep trim tight.


How door trim is attached
Door casing is nailed along two edges. Its inner edge is nailed into the door jamb with short finish nails, and its outer edge is nailed through the drywall into the framing beside the opening with longer ones. The two pieces meet at the top corners in a miter.
When the outer nails only catch drywall, or the wall isn't flat, the casing slowly pulls away and leaves a gap. Slamming doors, settling and seasonal swelling of the wood make it worse. If the jamb itself has moved or split, the trim is only showing the symptom.
Why door trim comes loose
They only held in drywall.
Vibration works nails loose.
The trim can't sit tight.
Seasons open the miter.
| You notice | Likely cause | Start at |
|---|---|---|
| Gap along the wall side | Outer nails let go | Step 4 |
| Inner edge lifting off the jamb | Short jamb nails | Step 3 |
| Top corner opening | Miter came apart | Step 5 |
| Trim won't lie flat | Wall bulge | Step 2 |
| Jamb cracked | Split jamb | Step 1 |
Let's fix it
- See why it pulled awayLook along the casing. If the whole piece has a gap at the wall, the outer nails let go. If it's loose near the corner, the miter has opened. If the door jamb itself is cracked or the door rubs, see the split jamb guide first, since new nails won't hold in a broken jamb.

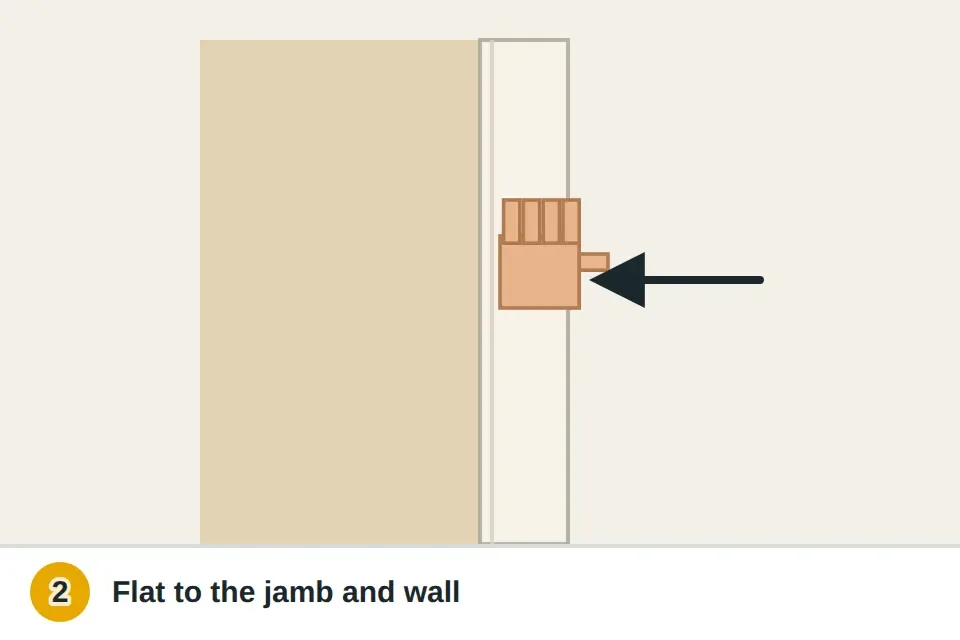
- Press it backPush the casing flat against the jamb and wall. If old nails are sticking out, pull them, or tap them back in with a nail set. If the wall bulges and the casing won't sit flat, a little drywall may need to be shaved behind it with a utility knife.
- Nail the inner edge to the jambAbout 1/4 inch from the inside edge of the casing, drive 1 1/4 inch finish nails into the edge of the jamb every 12 to 16 inches. Predrill with a bit slightly smaller than the nail within 2 inches of the ends so the wood doesn't split.

- Nail the outer edge to the framingAlong the outer edge, drive 2 to 2 1/2 inch finish nails at a slight angle into the framing right beside the door opening, every 12 to 16 inches. The doubled stud beside the jamb sits right behind the casing's outer edge, so nails about 1/2 to 3/4 inch in from that edge, angled slightly toward the opening, will hit it. Stop the last swing before the hammer hits the wood.

- Glue and pin the cornerIf the miter at the top has opened, work wood glue into the joint, press it closed and drive a small finish nail down through the top edge into the side piece. Predrill first. Wipe off squeezed-out glue with a damp rag.

- Set, fill and caulkSink each nail head about 1/16 inch below the surface with a nail set. Fill the holes with wood filler, let it dry and sand it flush. Run a thin bead of painter's caulk along the gap between the casing and the wall, smooth it with a wet finger, and touch up the paint.

Watch it done
- The casing sits flat to the wall and jamb
- No gap at the top corner
- Nail holes are filled and painted
Pulling away again? The nails likely missed the framing; renail closer to the jamb.
If the jamb is the problem
If the door jamb is cracked, see the guide for fixing a split door jamb.
If the trim needs to come off for painting or flooring, see the guide for removing trim without damage.
What a pro typically charges (a rough estimate; prices vary by area): A handyman typically charges $75–$200 to reset loose door trim, and more if the jamb needs repair or the trim replaced.
Find a carpenter near youSomething else going on?
Loose door trim questions
How do I fix door trim pulling away from the wall?
Press it flat and drive 2 to 2 1/2 inch finish nails along the outer edge into the framing beside the opening, then set, fill and caulk.
What size nails for door casing?
Usually about 1 1/4 inch into the jamb and 2 to 2 1/2 inch through the drywall into the framing.
Why is my door trim coming loose?
The outer nails often only caught drywall, and door slams and seasonal wood movement work them loose.
How do I close a gap at the top corner of door trim?
Glue the miter, press it closed and pin it with a small finish nail driven down through the top piece. Predrill first.
Should I caulk door trim to the wall?
Yes, on painted trim. A thin bead of painter's caulk hides the small gap and paints over.