Fix or replace a worn, loose or leaky exterior door threshold
The threshold, also called a saddle or sill, is the metal or wood strip under an exterior door. Over the years it gets stepped on thousands of times, so wear and loose screws are common. Often the fix costs nothing: many thresholds have an adjustable cap you can raise with a screwdriver. If the threshold is split or worn through, you can usually replace it in an afternoon with a saw, a pry bar and a hammer. If the wood under it is soft, stop and call a pro.
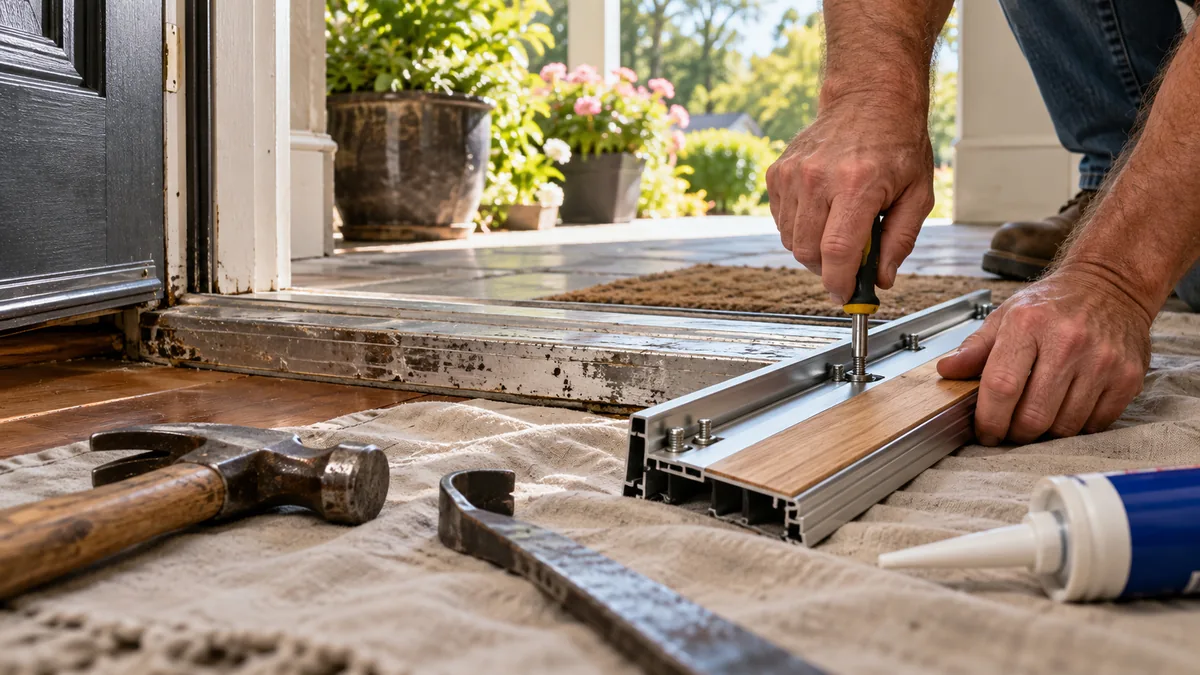


How an exterior door threshold keeps water out
An exterior door threshold does two jobs: it gives the door a hard edge to close against and sheds rain away from the house. Many have a raised center cap made of wood, vinyl or composite. When the door closes, the rubber sweep on the door bottom presses lightly on that cap. On an adjustable threshold, a row of screws in the cap lets you move it up or down. Reeb, a door maker, describes its adjustable sills this way.
Thresholds fail in a few ways. The cap wears down or the house settles, so a gap opens under the sweep. The screws into the floor loosen, so the threshold rocks and clicks. Wood thresholds wear through and split, and aluminum ones can crack at the ends. Reeb notes that sill nosings may crack with heavy use and need replacing. The worst case is water getting under the threshold. It soaks the subfloor and the bottom of the door frame, and that wood rots quietly.
Why an exterior door threshold leaks or comes loose
The sweep no longer touches the cap, so air and water get under.
The rubber is flat or split; replace the sweep, not the threshold.
The threshold rocks, clicks and lets water under.
A wood top worn through or cracked aluminum needs replacing.
Old caulk has dried out, so water runs under the threshold.
Soft wood under the door is a job for a carpenter.
| You notice | Likely cause | Start at |
|---|---|---|
| Not sure what's causing it | Test with a dollar bill and probe the wood | Step 1 |
| Draft or light under the door | Raise the adjustable cap | Step 2 |
| Threshold rocks or clicks | Re-screw it into solid wood | Step 3 |
| Cracked, worn or split | Cut and pry out the old one | Step 4 |
| Old one is out | Clean, check and bed the new one | Step 5 |
| New one is screwed down | Set the height and caulk the ends | Step 6 |
Let's fix it
- Test the seal and probe the woodFind out which problem you have before you buy anything. Close the door on a dollar bill near the hinge side, the middle and the latch side. Pull it out each time. A slight drag means the sweep is sealing there. No drag means a gap. Next, step on the threshold near each end and watch for rocking. Then press a flathead screwdriver into the wood just inside and outside the threshold, and into the bottom of each jamb. Firm wood only dents. If the tip sinks in, stop here and call a carpenter. If the cap has screws in it, go to Step 2. If it rocks, go to Step 3. If it is cracked or worn, go to Step 4.

- Raise the adjustable capLook at the raised center strip of the threshold. If it has a row of screw heads, it is likely an adjustable cap. Open the door. Use a Phillips screwdriver that fits the heads snugly. Turn each screw a quarter turn. On many caps, counterclockwise raises the cap, but designs vary, so watch which way it moves. Close the door and repeat the bill test. Stop when the bill drags at every spot and the door still latches without a hard push. If the screws spin and the cap doesn't move, the cap is likely worn out; replace the cap or the threshold.

- Re-screw a loose thresholdA threshold that rocks has loose floor screws. These are the screws in the sloped part of the metal, not in the cap. On some models they hide under the cap, so pry the cap up gently with a putty knife if you see no screws. Tighten each one with a screwdriver. If a screw spins without getting tight, back it out. Replace it with a stainless or coated exterior screw about 1/2 to 1 inch longer, so it bites fresh wood. Don't use drywall screws; they rust outside. On a concrete slab, drill with a masonry bit and use masonry anchors, as Pemko directs for concrete. Wear safety glasses for the dust. If a long screw still won't tighten, probe the wood again. Soft wood means stop and call a carpenter.

- Cut and pry out the old thresholdMeasure the old threshold first: length between the jambs, width front to back and height. Buy a matching one; adjustable aluminum with a wood or vinyl cap is common. Take the door off its hinges if it is in your way. Put on safety glasses and gloves. Remove every screw, including any hidden under the cap. The ends are often trapped under the jambs, so cut the threshold in two near the middle. Use a hacksaw or a reciprocating saw with a metal blade, and keep the blade off the floor below. Slip a flat pry bar under one cut end. Rest the bar on a scrap block and lift in small moves. Wiggle each half out toward the center.

- Clean the sill and bed the new thresholdWith safety glasses on, scrape off the old caulk. Hold a sharp wood chisel bevel side down and tap it with light hammer strokes, keeping it nearly flat so it doesn't dig in. Look closely at the bare wood. Dark, soft or wet wood means stop and call a carpenter. Next, dry-fit the new threshold. Mark where the jambs and stops meet it, then trim or notch the ends with a hacksaw to match. Pemko's instructions call for fitting around the jambs and stops this way. When it slides in snugly, lift it out. Run beads of exterior sealant under the full length of each leg and on the ends, as Pemko directs. Follow your threshold's instructions, and leave any drain holes or weep slots open.

- Screw it down, set the height and caulkSet the threshold into the sealant and press it down evenly. Drill pilot holes through its predrilled holes, as Pemko describes. Drive the supplied screws snug, but stop before the metal bends. Rehang the door if you took it off. Now set the cap height as in Step 2. Close the door on a dollar bill at three spots. It should drag a little everywhere, and the door should latch with a normal push. Run a small bead of exterior caulk where each end meets the jamb. Don't seal the outside edge shut where water drains. Let the sealant cure as its label says before heavy traffic or a hard rain.

Watch it done
- A dollar bill drags at every spot under the closed door
- The door latches with a normal push
- The threshold doesn't rock or click underfoot
- No light shows under the door and no water comes in after rain
Still leaking? Check the door sweep and side seals, then probe the wood at the jamb bottoms.
If it comes back
If the gap returns after a few months, the cap may have worn or the house may have shifted with the seasons. Raise the cap again a quarter turn at a time. If the door sweep is worn, our guide to weatherstripping a door shows how to swap it.
If the door now scrapes or won't latch after the change, see fixing a door that won't latch. A cracked jamb near the bottom is covered in fixing a split door jamb. Our hammer guide covers tapping a chisel and prying without marks.
If water keeps getting in and the wood below feels soft, the subfloor or frame is likely rotting. That needs a carpenter. For drafts elsewhere, see fixing drafty windows.
What a pro typically charges (a rough estimate; prices vary by area): A handyman typically charges about $150–$400 to replace a threshold. Rot repair to the subfloor or frame costs more.
Find a handyman near you