How to toenail a board
Toenailing means driving nails at an angle through the side of one board into another, when you can't nail straight through. It's how a stud gets fastened to a plate, a block goes in between joists, or a post gets tied to a beam. The tricks are starting the nail in the right spot, getting the angle right, and keeping the board from sliding as you hit it.

Why angled nails hold
Nails driven at an angle from opposite sides lock a joint together, a bit like two hands pinching. One angled nail on its own just pushes the board sideways, which is why toenails go in pairs, or threes on wider boards, from both sides.
Start the nail about 3/4 to 1 inch from the end of the board, roughly a third of the nail's length, angled at about 45 to 60 degrees, so it passes through the end and bites well into the other piece.
Why toenails slip
Each blow pushes the board off its mark.
The wood splits and the nail loses its grip.
The nail runs out the side instead of into the other board.
A single angled nail can't lock the joint.
| Setting | Aim for | Why |
|---|---|---|
| Where to start | About 3/4–1 inch from the end (a third of the nail's length) | Enough wood to hold without splitting. |
| Angle | About 45–60° | Carries the nail into the other board. |
| Number of nails | Two or three, from opposite sides | Locks the joint. |
| Hardwood or close to the end | Pre-drill | Prevents splits. |
Let's fix it
- Mark and brace the boardMark where the board belongs. Clamp or temporarily screw a scrap block against it on the far side, or brace it with your foot, so it can't slide when you start nailing.
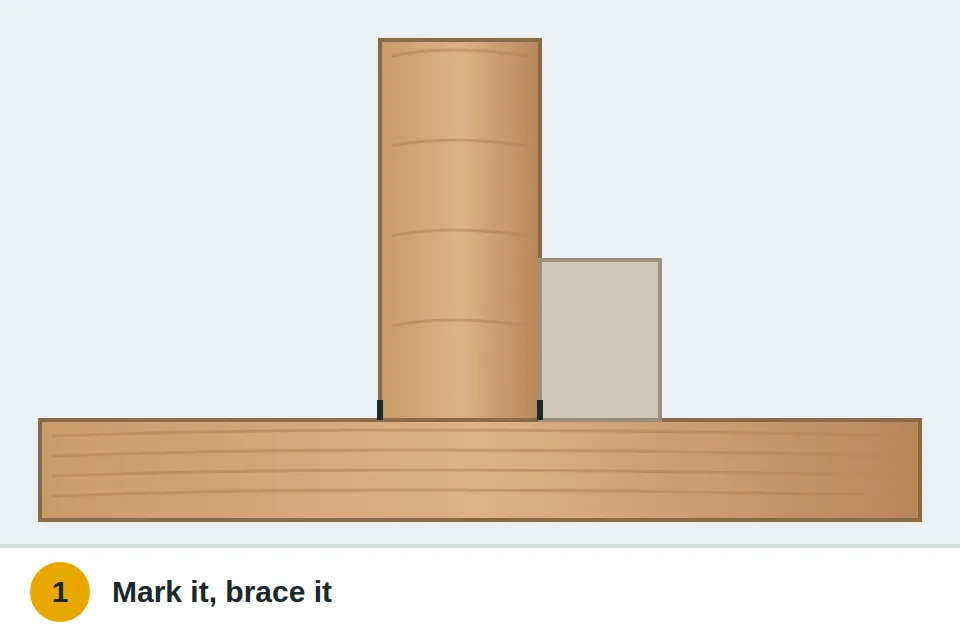
- Start the nail straight inSet the point about 3/4 to 1 inch from the end of the board and give it a couple of light taps straight in, just enough for it to bite.
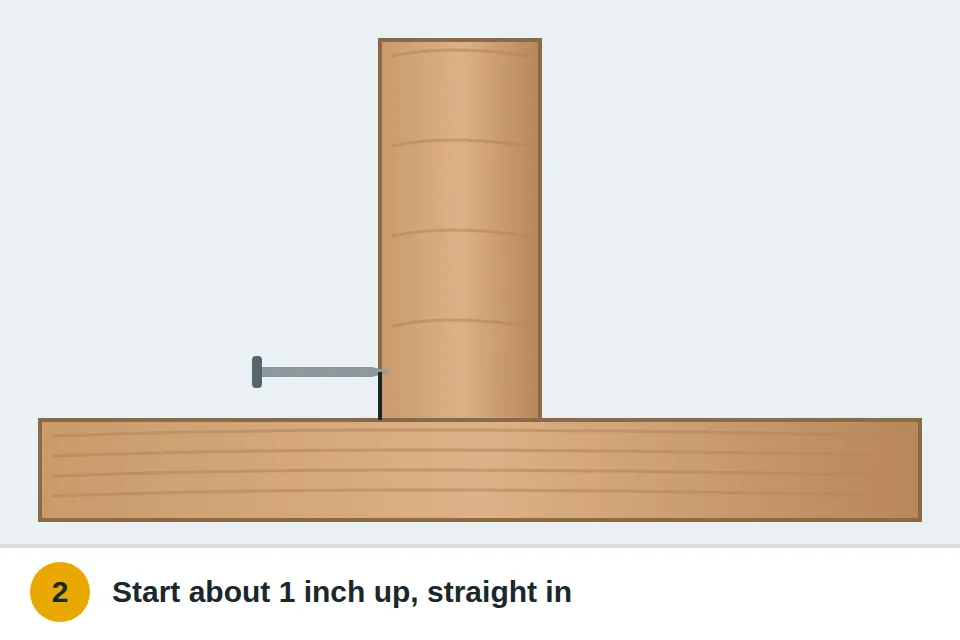
- Tip it to the angleTilt the nail to about 45 to 60 degrees toward the other board and drive it with firm, controlled blows. Watch that the point heads into the other piece, not out the side.
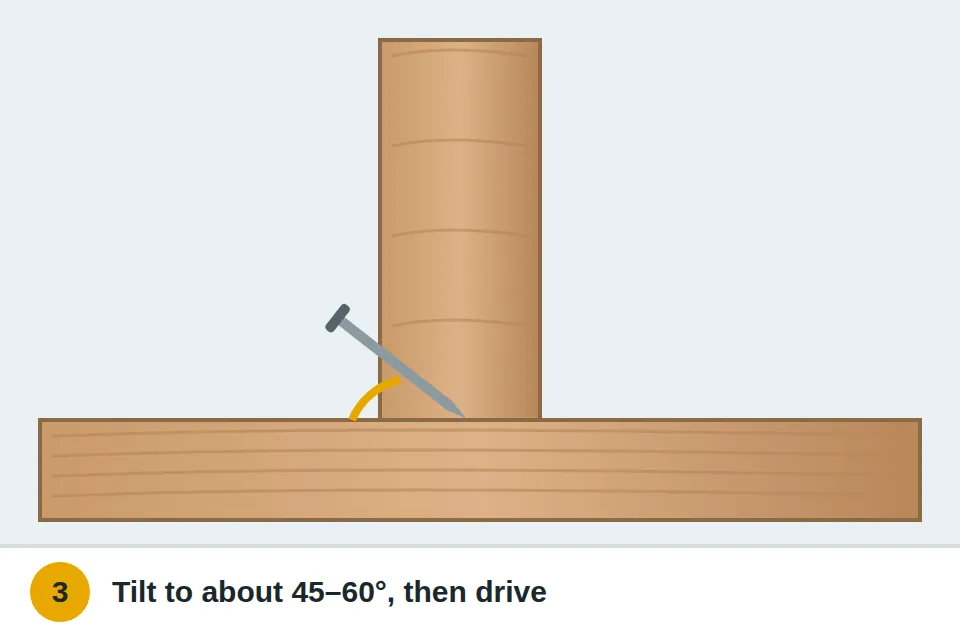
- Nail from the other sideDrive a matching nail from the opposite face. It pushes the board back toward where the first nail moved it and locks it in place.

- Check it and finishCheck the board is still on your mark. Add a third nail on a wide board. On visible work, stop just short and finish with a nail set so the hammer doesn't dent the wood.

If the board keeps sliding
If the board keeps creeping, brace it tighter, or put the first nail in from the other side, then come back.
If the wood splits, pull the nail, drill a pilot hole slightly smaller than the nail, and start a little farther from the end.
What a pro typically charges (a rough estimate; prices vary by area): A carpenter typically charges $60–$120 an hour; small framing repairs often take a few hours.
Something else going on?
Toenailing questions
What's toenailing used for?
Joining boards where you can't nail straight through, like a stud to a plate, blocking between joists, or a post to a beam.
Is toenailing as strong as face nailing?
It's weaker than a nail straight through the full thickness, which is why toenails go in pairs from opposite sides, and why some structural joints use metal connectors instead.
What nails should I use?
It depends on the lumber and the job. Framing often uses 8d or 16d nails, but follow local code for anything structural.
Can I use screws instead?
Structural screws rated for the job work well, and some are made for angled use. Ordinary drywall screws aren't strong enough.
Still stuck? Ask us
Tell us what you're seeing and what you've tried. We read every question, and the ones that will help other people get answered on this page.