Install quarter round or shoe molding
Quarter round and shoe molding cover the gap between the baseboard and the floor, especially after new flooring goes in. The detail that matters most is nailing it to the baseboard, not the floor, so a floating floor can still move underneath. A miter box and saw, a hammer, a nail set and some finish nails are all it takes.
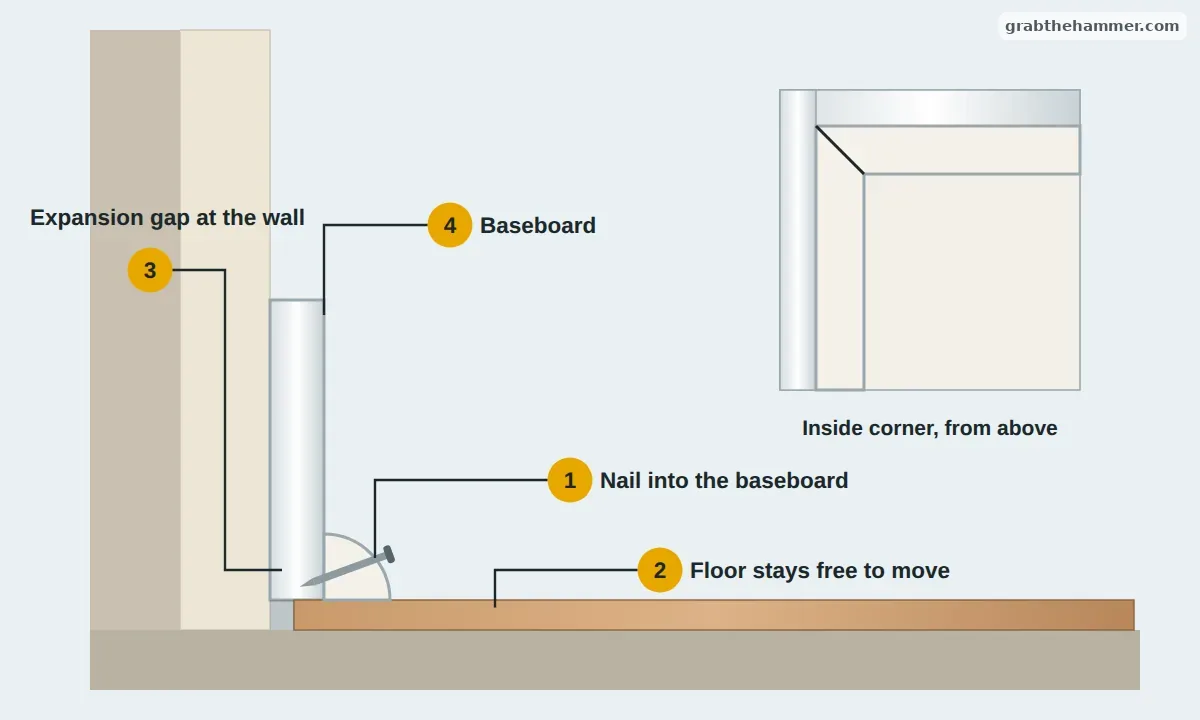
Why it's nailed to the baseboard
Quarter round is a quarter circle in profile; shoe molding is a little taller and thinner, and looks lighter. Either one hides the expansion gap a floor needs at the walls and covers spots where the baseboard doesn't sit tight to the floor.
Nail it into the baseboard, angled slightly down, and keep the nails out of the flooring. Floating laminate and vinyl floors expand and contract underneath the trim; nailing through them pins the floor in place, and it can buckle or separate.
Why molding looks bad
A pinned floating floor can buckle or separate.
Butted ends open up as the wood moves.
Walls are rarely square, so a straight 45 leaves a gap.
They show through paint and collect dirt.
| Feature | Quarter round | Shoe molding |
|---|---|---|
| Profile | A quarter circle | Taller and thinner |
| Look | Rounder and more noticeable | Slimmer and lighter |
| Covers | Bigger gaps | Smaller gaps |
| Nail into | The baseboard | The baseboard |
Let's fix it
- Measure each wallMeasure along the baseboard at floor level for each run. Write down the length and what happens at each end: inside corner, outside corner, or a square end at a door casing.

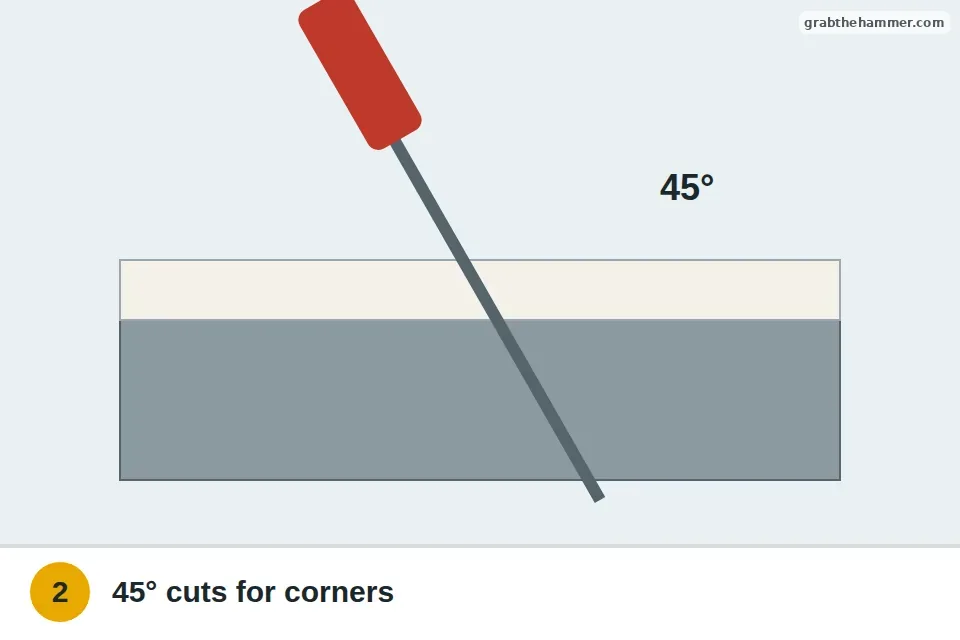
- Cut the cornersCut 45-degree miters for inside and outside corners. On walls longer than one piece, join the pieces with matching 45-degree scarf cuts rather than butting square ends together.
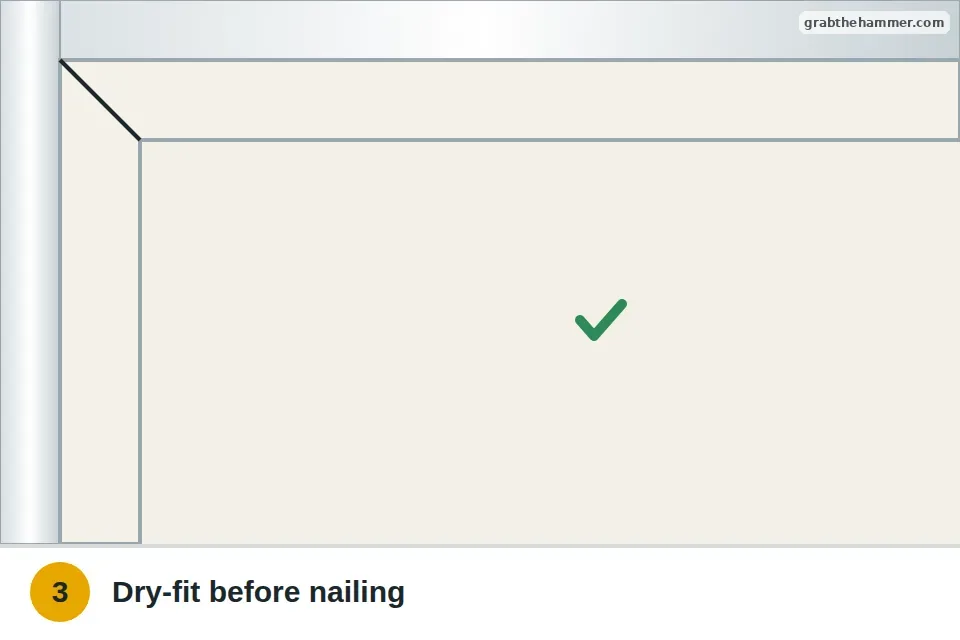
- Test the fitDry-fit each piece before nailing. Shave a little at a time off the ends until the corners close without forcing.
- Nail into the baseboardDrive finish nails every 12 to 16 inches through the middle of the molding into the baseboard, angled slightly down, and keep them out of the flooring. Near the ends, drill a small pilot hole first so the wood doesn't split. A brad nailer with 1 1/4 inch brads is faster and less likely to split the molding.

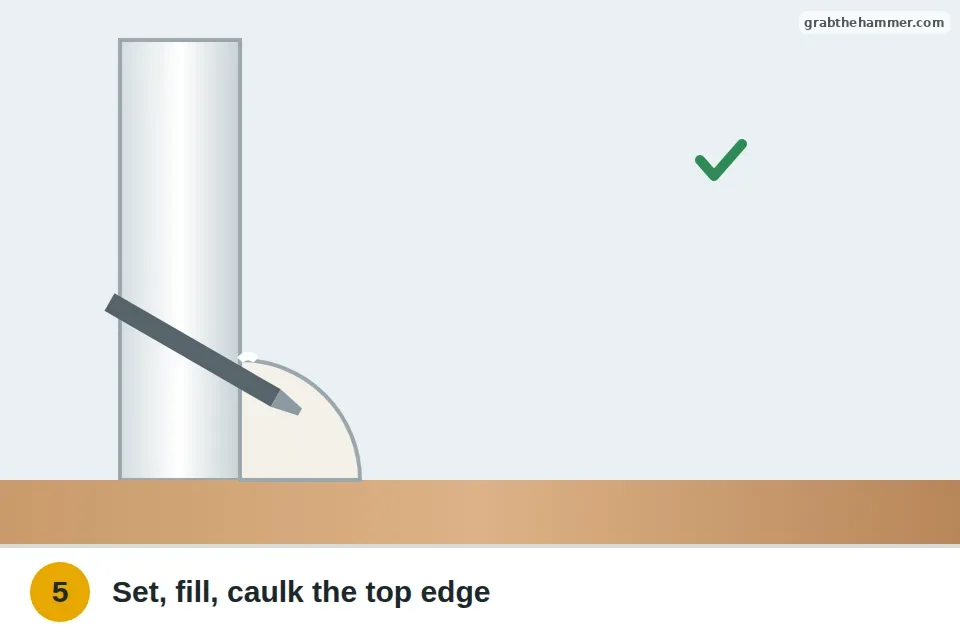
- Set and fill the nailsTap each nail head just below the surface with a nail set, fill the holes, and caulk the top edge where it meets the baseboard if there's a gap. Touch up the paint or stain.
If a corner won't close
If an outside corner gaps, add a little wood glue to the miter before nailing, and pin the two pieces together with a small brad.
If an inside corner won't close because the walls aren't square, cope the joint instead: cut a miter on one piece, then trim along its profile with a coping saw so it fits over the other piece.
What a pro typically charges (a rough estimate; prices vary by area): A carpenter or flooring installer typically charges $1–$3 per linear foot to install quarter round or shoe molding, often with a minimum charge.
Other floor problems
Quarter round questions
Do you nail quarter round to the floor or the baseboard?
To the baseboard. Nailing into a floating floor keeps it from moving and can make it buckle.
What size nails for quarter round?
Finish nails long enough to go through the molding and well into the baseboard, often around 1 1/4 to 1 1/2 inches. Pre-drill near the ends.
Should I caulk quarter round?
Caulk the top edge where it meets the baseboard if there's a gap, then paint. On floating floors, leave the bottom edge uncaulked unless the flooring maker says otherwise.
Can I install it without a miter saw?
Yes. A hand miter box and saw work fine for quarter round and shoe molding.
Still stuck? Ask us
Tell us what you're seeing and what you've tried. We read every question, and the ones that will help other people get answered on this page.